
Automotive Lift Anchor Guide for Safe Installs
Automotive Lift Anchor Guide for Safe Installs
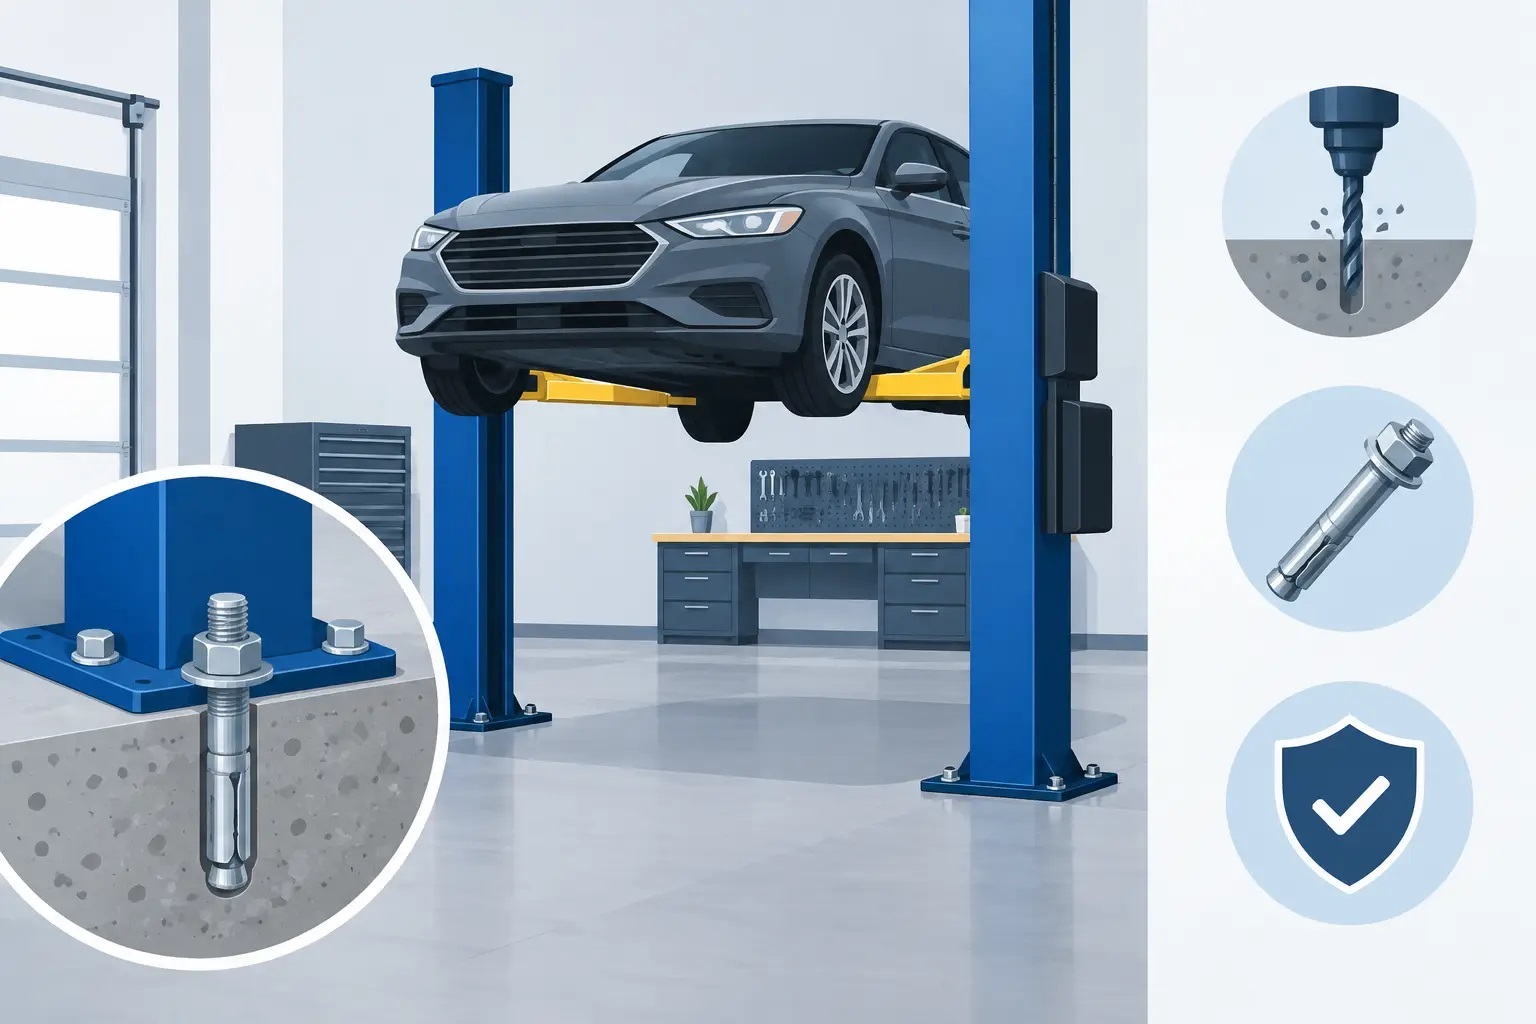
A lift can have the right capacity, the right arm configuration, and every available accessory, yet still be unsafe if its anchors are installed in unsuitable concrete. On a two-post lift especially, the anchors and the slab are part of the lifting system. This automotive lift anchor guide covers what shop owners, installers, and serious home-garage buyers need to verify before drilling the first hole.
Why automotive lift anchors deserve serious attention
Lift anchors do more than hold columns in place. They transfer loading forces from the lift into the concrete foundation. When a vehicle is raised, the columns are subjected to vertical loading, side loading, and overturning forces. Improper anchor selection, inadequate embedment, weak concrete, or poor hole preparation can reduce the system's ability to resist those forces.
The consequences are not limited to a loose nut or a column that needs re-leveling. A compromised anchor can contribute to column movement, cracking at the base plate, loss of lift stability, equipment damage, and injury. That is why every lift manufacturer provides specific requirements for anchor diameter, embedment depth, concrete strength, slab thickness, spacing, and torque.
Those requirements are not suggestions. They are part of the lift's listed installation procedure. Never substitute a different anchor because it appears similar, and never assume anchors supplied with one lift are appropriate for another model.
Start with the slab, not the anchor box
The first question is whether the floor meets the lift manufacturer's concrete specification. For many standard two-post lifts, that commonly means a sound, level concrete slab with a minimum thickness and compressive strength specified by the manufacturer. A frequently seen requirement is 4 inches of 3,000 PSI concrete, but that is not a universal rule. Higher-capacity lifts, wide-base models, asymmetric lifts, truck lifts, and certain specialty equipment may require a thicker slab, stronger concrete, or an engineered footing.
Concrete condition matters as much as its original rating. Do not install a lift over severely cracked concrete, deteriorated surfaces, patched areas of unknown depth, expansion joints, or a slab with questionable reinforcement and curing history. A slab may look solid at the surface while containing voids, thin areas, or previous repairs below.
For a new shop build, plan lift locations before the pour. This gives the contractor time to provide the correct thickness, reinforcement, and footing design where needed. It also helps you avoid drains, radiant floor heating, conduit, plumbing, and other obstructions. For an existing building, review construction documents if available. If the slab is uncertain, a qualified concrete or structural professional can help determine whether it is suitable.
Do not install across cracks or joints
Anchor placement near a crack, control joint, cold joint, or slab edge can reduce the concrete's resistance to breakout. The lift manual will specify minimum clearance from cracks, walls, edges, and other anchors. Follow those dimensions exactly.
A common mistake is shifting a column to work around a floor drain or door track, then drilling where the base plate lands. Moving a column can affect bay width, vehicle approach, arm reach, cable routing, and anchor edge distances. If the planned location does not work, stop and resolve the layout before installation.
Anchor types and why substitutions are risky
Most automotive lifts use manufacturer-supplied mechanical expansion anchors, often called wedge anchors. As the anchor is tightened, the expansion clip grips the walls of the drilled hole. Proper hole diameter, depth, cleaning, and torque are essential to achieve the intended holding value.
Some installations may call for other engineered fastening systems, particularly in unusual concrete conditions or for specialized equipment. Chemical anchors, for example, require precisely drilled and cleaned holes, approved adhesive, temperature-aware curing, and correct installation procedures. They are not a casual replacement for a wedge anchor.
Do not use generic hardware-store anchors, lag shields, masonry screws, or a different diameter bolt because it fits a base-plate opening. Anchor performance is based on the complete system: anchor design, concrete strength, edge distance, embedment, load direction, and installation method. Changing one part can invalidate the design assumptions behind the lift.
If supplied anchors are missing, damaged, corroded, or installed incorrectly, obtain the specified replacement from the lift manufacturer or follow written manufacturer guidance for an approved equivalent. This is one area where saving a few dollars is not a value decision.
The installation details that affect holding strength
A correct anchor installation is methodical. The installer first positions, levels, and plumbs the columns according to the lift instructions. Holes are drilled through the base plate with the required bit size and to the required depth. Drilling at an angle, using a worn bit, or drilling too shallow can keep the anchor from seating correctly.
Hole cleaning is often overlooked. Dust left in the hole can interfere with anchor seating and, with adhesive systems, can significantly reduce bond performance. Follow the lift manual's cleaning steps. Depending on the specified anchor, that may involve blowing out the hole, brushing it, and repeating the process before installation.
The anchor must then be set to the required embedment depth. Torque is equally critical. Under-torquing may leave the anchor insufficiently expanded. Over-torquing can damage threads, overstress the anchor, or crack the concrete around it. Use a calibrated torque wrench, not an impact gun, for final tightening.
After the first loaded cycles, the manufacturer may require rechecking torque and inspecting the base plates. New installations settle into service, and early verification is practical preventive maintenance.
Common automotive lift anchor installation mistakes
Most anchor problems trace back to a short list of preventable errors:
- Installing on concrete that is too thin, too weak, damaged, or not fully cured.
- Drilling holes too large, too shallow, angled, or too close to a crack or slab edge.
- Failing to remove drilling dust before setting the anchor.
- Using an impact wrench for final torque or guessing at torque values.
- Reusing anchors that were removed, pulled, bent, heavily corroded, or improperly installed.
- Adding shims, grout, or base-plate modifications that are not approved by the lift manufacturer.
Shimming deserves special attention. Some lifts permit limited shimming for a level installation, while others provide specific instructions or restrictions. Improvised stacks of washers or oversized shims can change how the base plate transfers loads into the slab. Use only the method and materials allowed by the lift documentation.
Inspection is part of owning a lift
Anchors are not a one-time installation item. Include them in the lift's routine inspection program. Before operation, technicians should look for loose nuts, visible gaps beneath the base plate, concrete cracking around anchors, corrosion, bent hardware, or column movement. Any new crack, especially one radiating from a base plate or anchor, deserves immediate attention.
Inspection intervals depend on the lift manufacturer, use frequency, and workplace requirements. A busy service department lifting vehicles all day needs a more disciplined inspection routine than a lightly used collector garage. In either setting, a lift should be taken out of service if an anchor, base plate, or concrete condition appears questionable.
Do not simply tighten a loose anchor and return the lift to service. Determine why it loosened. The issue could be incorrect torque, inadequate embedment, damaged threads, slab movement, or concrete failure. A qualified lift service technician or installer can assess the condition and coordinate with the manufacturer when needed.
Plan anchors alongside the complete lift installation
Anchors are one part of a larger installation decision. Ceiling height, bay width, overhead obstructions, electrical supply, air requirements, vehicle mix, door clearance, and approach space all influence which lift is practical. A two-post lift offers open access for tires, brakes, suspension, and undercar service, but it places substantial demands on proper concrete and anchoring. Four-post and parking lifts have different footprint and anchoring requirements, while scissor lifts may have their own slab, recess, or surface-mount considerations.
Before ordering, compare the lift manual against your actual site conditions, not a rough estimate of them. For commercial projects, document the slab details and planned lift location before scheduling delivery and installation. MyToolEquipmentGuy.com can help buyers narrow down lift style and capacity, but the final installation must follow the specific manufacturer instructions and applicable local building and safety requirements.
A vehicle lift earns its keep through dependable daily service. Give the anchors and concrete the same attention you give capacity, arm reach, and shop layout, and you start with a foundation built for safe work.
Recent Posts
-
Automotive Lift Anchor Guide for Safe Installs
Automotive Lift Anchor Guide for Safe Installs A lift can have the right capacity, the right arm c …19th Oct 2026 -
Tire Changer Reviews for Serious Shop Buyers
Tire Changer Reviews for Serious Shop Buyers A tire changer can look like a simple piece of shop eq …17th Oct 2026 -
Best Vehicle Hoists for Shops and Home Garages
Best Vehicle Hoists for Shops and Home Garages A lift that is too light for the work, too tall for …15th Oct 2026